

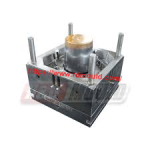

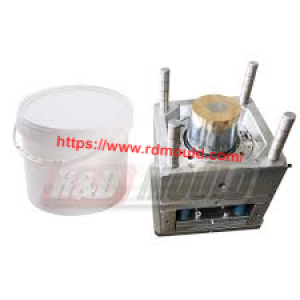

A bucket that slides off the core with a long graze down one wall tells a specific story, and it is rarely the story of a tool that has simply worn out. The mark appears in the same region shift after shift, and an operator watching closely will notice it fades or deepens with changes in cycle time and melt temperature. Anyone running a Bucket mold meets this defect sooner or later, and the engineers at rdmould treat it as a diagnostic clue rather than an isolated annoyance. So what actually produces that graze as the part leaves the steel?
The first candidate is draft, and it deserves attention before anything else is adjusted. Plastic shrinks onto the core as it cools, and the resulting grip is proportional to the contact area between bucket wall and steel. A deep wall on a large pail presents a substantial surface, and a taper that suits a small container will drag on the large one. The mark from insufficient draft tends to appear as a broad, even scuff rather than a sharp line, and it worsens as the wall grows taller.
Surface finish follows closely. A core polished to a fine finish releases plastic with low friction, while a core with directional polishing marks or residual texture creates resistance along the direction of ejection. Scratches traced to finish often appear as parallel lines that follow the polishing direction, and a re-polish along the correct axis removes them. This is one reason a tool that performed well for a season can begin marking parts after routine maintenance has been carried out with insufficient attention to the direction of the final pass.
Core alignment sits behind many persistent cases. If the core sits slightly off centre relative to the cavity, wall thickness varies around the circumference, and the thin side grips and releases under different conditions than the thick side. The result is a scratch confined to one region of the bucket, which is often misread as a local polishing problem. Checking concentricity before reaching for abrasives saves time and prevents the real cause from being masked.
Thermal conditions produce a similar signature. Plastic that has not cooled sufficiently before ejection remains soft, and a soft wall scuffs against steel that would leave a harder wall untouched. Cooling channels positioned too far from the molding surface, or water flow restricted in one circuit, create a local hot zone that keeps part of the wall pliable at the moment of release. The scratch then follows the hot region, and adjusting ejection timing alone will not settle it while the thermal imbalance remains.
Ejection mechanics complete the picture. Stripper plates and air assistance need to act evenly, and any binding in the ejection system introduces a sideways force that drags the wall against the core. Alignment of the ejector assembly, wear on guide components, and uneven stripper contact all feed into this category.
RuiDing treats these factors as one system rather than a list of separate fixes, and the paint bucket tooling described at https://www.rdmould.com reflects an approach in which cooling layout, steel selection, and machining precision are settled during design so that ejection marks are prevented rather than corrected afterward. Buyers who describe their wall thickness, cycle target, and resin at the enquiry stage give the toolmaker the information needed to build release into the tool from the start.
A scratch on a bucket wall is a message about where friction exceeded clearance, and the message usually names draft, finish, alignment, heat, or ejection rather than chance. Reading it in that order turns a recurring defect into a solvable specification question, and a Bucket mold built with those answers in place releases parts cleanly for the whole of its working life.